google.com, pub-1183232341631896, DIRECT, f08c47fec0942fa0 We Discover Canada And Beyond
My RV Cook Book, "Tinfoil Cooking" is now published on Amazon!

Check it out Amazon.ca, Amazon.com, Amazon.de, Amazon.co.uk or any other site worldwide! For a luxury coilbound version on 80# stock go to my cooking website AndersCooks.ca


29 December 2017

Replacing The Door Handle on The RV Screen Door


Replacing The Latch On The RV Screen Door.


Broken latch on the RV Screen door.
Broken Latch On The RV Screen Door.
Stuff happens and this time I guess I'm a bit at fault. I think I might just have slammed the screen door a bit too hard and broke the latch.


I'm writing this blog post from Cathedral City, California. We have camp set up at Palm Springs Oasis RV Park. A great park, nice and clean and super nice swimming pools.


Back to the darn door. Last year when we were down here I had my head in the toilet, but that's a whole different story.


You can read about it on the "Head In The Toilet" post.


This one is a pretty easy job, at least I thought so starting out. First, though I called  Benlo Co. RV Service and supplies, located in Indio.


They are our go-to place down here if we need something. Can't say enough good things about them.


Sure enough, they have four different kinds. "Just bring your pice in and we'll see if we can match one up".


New Latch in Place. Note new self-tapping screw.
New Latch in Place. Note new self-tapping screw.
We drive over to them, about 13 km from the RV Park. We buy one that looks pretty close.


Back at the trailer, I start to install the new part and it is just a tad bigger than the old one.


One screw is in but I will need to either drill a new hole or use a self-tapping screw. I opt for the later.


It works just fine and we are back in business.


This is not a hard job to do and in my case, I just needed two screwdrivers to do the job.


Life is good

Cheers,

Anders


26 December 2017

Cleaning Your Bathroom Fan On Your RV


Super Duty Screen And Fan Cleaning In Your RV


Our RV Bathroom Fan.
RV Bathroom Fan
Cleaning your bathroom fan in your RV is often overlooked. It is important that you get into the habit of cleaning it.

If not, you will leave a lot of moister in your RV and then you create a whole bunch of other problems like mold etc. It's a good idea to run your bathroom fan every time you have showers, cook pasta, boil potatoes etc. You know what I mean.

It is further important to keep the fan clean for the motor not to work too hard. This is, of course, important when you are boondocking and want to consume less power.

We vacuum the screen on the fan every time we vacuum the rest of the trailer. This clears the screen pretty good but every so often you should do a deep cleaning.

Since there are many different types of fans each process will be a bit different.

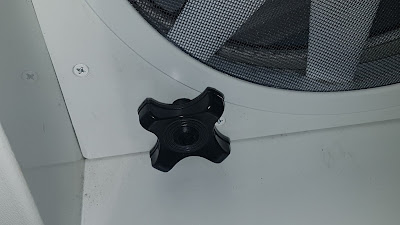
Knob for raising and closing vent on top of trailer
If you have a knob like this to open and close the vent, it will more then
likely have a screw through the center of the knob.
On our fan, the actual screen pops out but for easier cleaning of the fan blades, I like to remove the cover completely.

For this you need is a screwdriver, in our case a Philips.

Depending on your unit, if it is like mine there is also a screw in the knob that opens the top flap.


After you got the assembly removed (it will still be attached to electrical cords) you just need some Windex and a rag. The dirtiest part of the fan will be the top of the fan blade that you can't see from down below.

Wet the rag with water and wring it out, then spray down one corner of the rag with Windex get it good and soaked.

Now wipe each fan blade. If you have not done this in a while you will have to rub a bit to get it clean. If it's really dirty you may have to rinse your rag out several times and add more Windex.

Once you got it all nice and shiny, put everything back together.

Cheers,

Anders


12 September 2017

Solar Shower For RV'ing


Solar Shower For Your RV


Solar shower in place on the rear ladder of our trailer.
Solar Shower in Place
If you have not yet purchased a solar shower for your RV it is time. Once you have used one you wonder why you waited so long.


Not only do you save on energy but also your holding tanks will not fill up as fast. This is especially true when boondocking or camping in parks with limited services.


Some people think that the water will not heat up fast enough. Worry no more, as long as you have a bit of sunshine the water keeps heating up.


In full sunshine you will have warm water in 3 hours. The water can actually get to hot, so check first and if it is hot, just add some cold water.


The Solar Showers are very affordable, starting at $10.00 (yes that's right, ten dollar) and go up from there.


Solar Shower
Solar Shower

We have two, Super Solar Shower, one smaller, 2.5 gallon and one larger, 5 gallon. Water is heavy so keep that in mind. Five gallons weigh in around 40 lbs. You do not have to fill up the whole bag, but a larger bag is nice not to have so you don't have to refill all the time.

A five gallon Solar Shower is enough for 3-4 showers. The smaller bag is also great for doing dishes and rinsing feet etc.


Deck and Balcony Tiles

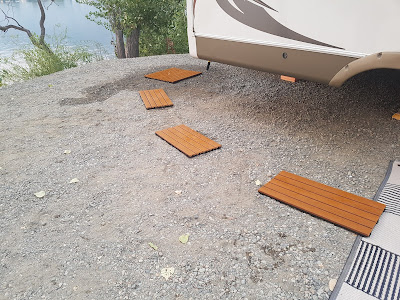
Lay out the remaining tiles and use as stepping stones.
Remaining tiles makes great stepping stones.
Now, it can get a bit messy where you are standing having your shower, so what we did, we went to Home Depot and got some Deck & Balcony Tiles.


These plastic slotted tiles are 1 x 2 feet come in different colours. Five in a package.


They interlock with each other and no tools required to put together. We put two of them together for a platform to stand on when having the shower.


The other three tiles we use as stepping stones to get back to the out door carpet. This keeps the dirt off your feet and out of the RV.

Cheers,

Anders


03 July 2017

To Drive or Not to Drive in Central America


Is it safe for me to drive in Central America?


Doug and Johanne Dyer Laguna de Apoyo, Nicaragua. Doug is the author of A Tale of Two Geckos
Doug and Johanne Dyer in Laguna de Apoyo, Nicaragua.
Doug is the author of A Tale of Two Geckos
The following post is from a good friend of mine Doug Dyer. Doug and his wife Johanne are enjoying life house sitting all over the world. Here is their website. Thanks for the post Doug.


Doug just recently wrote a fantastic book called "A Tale of Two Geckos: We Transformed Our Lives and So Can You!"


If you want the US version of Amazon, its here.  Once you get started reading you will not be able to stop.


You can get a digital copy at Amazon. No Kindle required just download an app for your pc, apple, android or what have you.  The book will change you and is so inspiring. The best part it is only around $1.00..... got to love it.

Doug and Johanne also writes for International Living and House Sitting Magazine.

OK, on to the actual guest post from Doug.

Is it safe for me to drive in Central America?


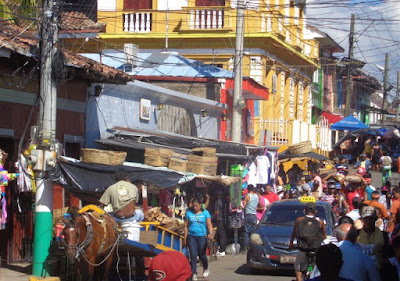
A busy street in Granada, Nicaragua Central America
Busy Street in  Granada, Nicaragua
I have recently been confronted with the above dilemma and you may well be too.


Let me share with you what I experienced when I mustered up my nerve and got behind the wheel of a car in Nicaragua.


Chaos like you cannot anticipate meets you as you pull out onto the road. All of your senses come to full attention, adrenaline rushes in.

I don’t remember this being on my driver’s test – ever!!

Travelling in Catarina, Nicaragua by car can be a challenge. As long as you get there it's ok.
Travel any which way. What ever takes you there is OK.
Catarina, Nicaragua
Be prepared for a myriad of massive trucks, barreling buses, taxis, horse carts, tuc-tucs, scooters, bicycles and pedestrians all vying for the same narrow ribbon of concrete that is misnamed  a highway.


To me there is no rhyme or reason, but somehow it all seems to have a flow.


The road way itself is littered with the pesky pot holes and heavily camouflaged speed bumps.


Cattle on the road Ometepe Island, Nicaragua
Cattle on the road, Ometepe Island, Nicaragua

You can find anything on the road in Central America. Oxen pulling a load. No plans for a wrestling match here.
Oxen pulling a load. No plans for a wrestling match here.
Ometepe Island, Nicaragua
Don’t be looking for signage or directional arrows for guidance as they are most often forgotten or misplaced.

Sometimes what you think is actually a road headed back to town will instantly morph into a goat trail or alley into someone’s yard.

Oh and that one way that I headed down in the wrong direction? The locals were generally amused and forgiving.

I have yet to mention the living moving obstacles which will include; dogs, chickens, horses, cows, lots of cows, and the old guy pushing an ice cream cart.

Little kids laugh and play unsupervised along the sides of the road and the buses load and unload at will.

The other day I found myself in the driver’s seat staring down a very large bull that had little interest in giving way to little old me. In good time he and his buddies shuffled along down the road.

Of course this is what you see in the light of day; don’t even consider venturing out after night fall, lighting is optional.

So did I answer the question?  Not really but maybe you get the picture.

Doug and Johanne Dyer, The Joyful Travellers

04 February 2017

Preventing RV BBQ Flare up


Tip for preventing flare up on your RV BBQ


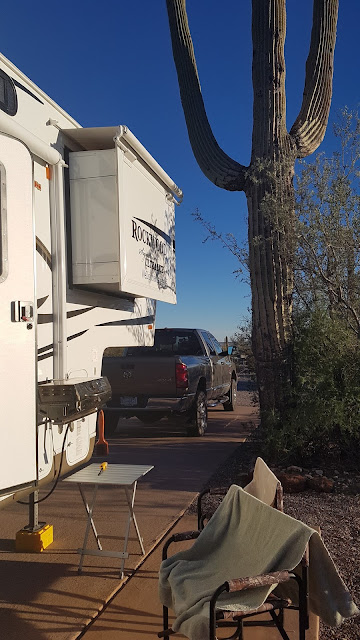
RV BBQ Ready to go. In Organ Pipe National Monument, Arizona.
Most BBQ's that come with RV's are pretty small and most come with only one burner.


This makes it hard to cook meat that has more fat in it, like a pork roast of even half a chicken with bone in and skin on. The flare up can be a real pain.


The little BBQ we have on our 5th wheel is a good little BBQ but again it has only one burner and cooking one of my favourite "half chicken with bone in and skin on" can be a challenge to say the least.


What I do to prevent flare up is use tin foil to make a little "pan". I use the heavy duty tin foil you can buy at Costco. It is really good and strong.


Take about 18 inches and fold in to a size that fits the meat you are going to BBQ.


If you cook two large chicken breast, bone in and skin on, make two pans to fit each chicken breast.


When you fold the tin foil make sure the shiny side is up to reflect more heat. Make little edges so the grease will not run off and cause more flare ups.

Whole Breast of Chicken, Bone in, Skin on. A Small Tray For Each Chicken Breast.

Asparagus cooking in trays with the left over fat from the Chicken. Just cook till crisp.

A glass of rosé wine goes just great with chicken.
Once your chicken is cooked wrap it in some more tin foil and let sit 10 min or so. It will continue to cook.


Now if you have some asparagus ready, throw them on the BBQ in the grease that's left on the pans or trays.


Cook till crisp, don't over cook.


Match this wonderful chicken with a nice glass of Rosé. Serve chilled.


Well, I hope that works for you.

Cheers,

Anders

16 January 2017

Replacing Battery And Propane Vents


General Maintenance of Your RV - Replacing The Battery Box Vent and Propane Compartment Vents


Cracked Vent
As your RV gets older and it is exposed to the elements some of the plastic just cracks and need to be replaced.


This was the case with two of my three vents.


I have one for each propane tank and one for the batteries. They are often referred to as Battery Box Vents.


This is a pretty easy job and can be done in less then half an hour.


Stuff needed for this job:
  • Philips Screw driver
  • Flat Screw driver
  • Caulking gun
  • Caulking
  • Paper Towel
  • Spray Nine cleaner or Windex

Cleaned up vent hole on trailer for the battery box vent
Cleaned up vent hole on trailer

New Battery Box Vent in Place
New Battery Box Vent in Place.
Remove the four screws holding the vent in place and put to the side. You will need them again.


If the vent does not come off, grab the flat screw driver and from the side give it a gentle tap and it will fall off.


Remove any excess old caulking. I found that the flat screw driver works well, just gently scrap it off or use a plastic scraper of some kind.


Clean off with cleaner and paper towel. Let it dry.


In the meantime, turn the new vent upside down and put a bead of caulking close to the outside edge and completely around the four holes.


Install the vent and as you tighten the screws up the caulking will ooze out on the sides.


Make sure not to tighten it to much. The plastic will crack.

You can clean up the excess caulking or leave it, your choice.

Cheers,

Anders


Head in The Toilet. Aqua Magic Style ll Water Valve


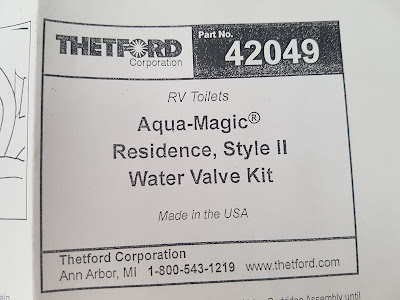
Changing The Water Valve in Aqua Magic Style 2 Toilet. Part # 42049


Aqua Magic Style II Water Valve Kit
Instructions for Aqua Magic Style 2 Water Valve Kit

Sometimes things on the RV or in our case the 5th Wheel Trailer breaks down.

In our case the water valve in the RV toilet would not shut off. The water just keeps running.

This happen to us after sitting for several months and not being used.

It was actually just before Christmas and we had several of our kids and grand kids coming up and we needed the extra space in the trailer.

I filled the trailer up with water and then turned the pump on and the water in to the toilet just kept running.

Living on a small little Island in the Pacific Ocean there was not a hope of getting a new valve for the toilet.

So what I did in the meantime was to install a brass shut off valve on the waterline.

This way the toilet could still be used. A bit of a pain having to shut the water off manually, but way better then not having a toilet at all.

We had a trip planned to California and Arizona starting New Years Day. I could always pick up a water valve there or on the road down some place.

Actually as I am writing this blog post we are camped at Palm Springs Oasis RV Park in Cathedral City, California. This is a very nice park by the way.

I got the water valve for the Aqua Magic Style II, part number 42049 from a local dealer here in the Palm Springs area called Benlo Co. RV Service and supplies. Very good and efficient.

This is what you need for the repair:


Stuff needed for the repair job of the Aqua Magic Style 2 toilet
Stuff needed for the repair job.
  • The Aqua Magic Style II replacement kit. Part number 42049. Comes with instructions.
  • Three large Garbage Bags
  • A set of latex gloves
  • Head lamp or flash light
  • Plumber Pliers
  • Needle Nose pliers
  • ½ inch Wrench
  • Philips Screwdriver
  • Flat Screwdriver
  • Vaseline
  • Phone and or Digital Camera
  • Roll of Paper towel or Rags
  • Towel
  • Spray Nine or other disinfectant cleaner
Have a good look at your repair kit/water valve kit. Make sure all the pieces are there. When you dismantle the toilet take pictures as you go. They will come in handy if you forget some steps. If you have lots of room beside your toilet (on the Pedal side) you do not need to remove the toilet. However most bathrooms in RV's are pretty tight.

Removing the Aqua Magic Style II Toilet:

  • Before you start, spread a large plastic garbage bag on the floor. 
  • Clean out toilet well, empty the black tank and flush well. Add deodorizer and whatever liquid you use for the black tank. Use Spray Nine and clean the toilet well. 
  • Turn off water pump or disconnect water supply. Drain all water inside using the Pedal.
  • If you have a pressure tank installed like I do, make sure to drain/release all the pressure in the lines or close by pass valve.
  • Disconnect the water supply to the toilet. You may need a set of pliers or plumber pliers for this. Put some towels around the supply line to catch any water coming out.
  • Using the flat screwdriver pop off the plastic caps covering the Flange Nuts.
  • Grab the ½ inch wrench and remove the Flange Nuts. Note that these nuts are not super tight. Important when you install it back again.
  • Lift the toilet straight up and lay it down on the garbage bag on its side, pedal side up.
  • Use second garbage bag to cover the hole in the floor.
Toilet removed. Note brass water valve I
installed on the water line at the back of the toilet.


Now is a good time to take some more pictures even from the bottom side so you can see how the Closet Flange Seal fits on to the bottom of the toilet.... I know it may not look pretty.


Removing the Aqua Magic Style ll Water Valve.

Grab handle and make a quick jerk for  the handle to come off.
Grab handle and make a quick jerk for
the handle to come off.

  • With the toilet laying on its side, use your left hand holding the toilet bowl, grab the pedal with your right hand and give it a quick jerk up and off. I know what you are thinking, you are going to break the darn thing, but not so. Just give it a good pull and it will snap off. Put it to the side.
  • Take some more pictures of what you see.
  • The next step seems impossible but it works.... using your right hand, put your thumb in to the depression of the valve, fingers under the retainer, lift slightly and turn clockwise and it will come off just like that.
  • Put to the side. I use the sink (close drain) or shower to put all the stuff in. Another picture maybe
  • Grab your needle nose pliers and remove the Water Inlet Seal and compression spring (this is the sucker that caused the problem to start with). Put to the side.

Installing The New Aqua Magic Style II Water Valve

Close up of the Water Valve Cartridge Assembly. Note you will not have the brass valve on the far left. I installed that to be able to turn the water off
Close up of the Water Valve Cartridge Assembly. Note you will not have
the brass valve on the far left. I installed that to be able to turn the water off
  • Using the Philips screw driver, insert the new Water Inlet Seal Assembly. The Spring only goes or fits one way in to the seal assembly.
  • Put a tiny bit of Vaseline on the O-Ring on the Valve Cartridge.
  • Insert new Water Valve Cartridge Assembly until fully seated. Note, if the Water Valve Cartridge Assembly is apart the Valve pice fits in to the Cartridge from underneath not from the top. Also make sure the O-Ring has not fallen off. It makes a big mess when you turn the water back on again. Yes I did experience this.
  • Rotate retainer until it clicks in to place.
  • When installing the pedal back in to place, you will need a bit of patience... a bit of swearing helps as well.
  • Place Water Valve Arm in closed position.
  • You have to make sure the arm lines up in three places. First the Water valve arm and the spring pedal pivot, then you push down (like you would step on the pedal) a bit and the drive arm pin fits in. 
  • Once in place keep pressure on it and then give it a good whack. It will snap in to place.
  • Set toilet up on plastic bag and operate the pedal several times making sure the waste ball opens and closes properly. If the pedal falls off you screwed up, do it over again. I'm talking from experience here.
Once you have it all back in to place it is time for dirty work and time for the latex gloves, just slip them on..... and pretend you are a doctor doing a prostate check.

Remove the old Closet Flange seal and discard in third garbage bag. Using rags or paper towel clean out the flange. This is the time when you also clean out the floor area where the toilet sits on and the Closet Flange Seal meets the floor area.

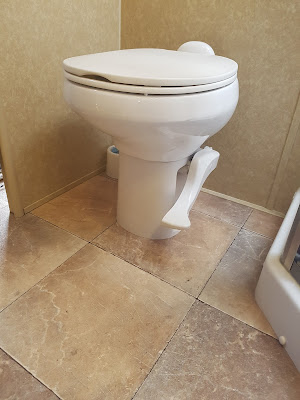
Installing Aqua Magic Style II toilet

Aqua Magic Style 2 water valve installed, toilet in place.
  • Install the Closet Flange Seal on the toilet itself. Lip side down.
  • Remove plastic bag from opening in the floor.
  • Remove and discard latex gloves.
  • Lift up toilet and align the flange bolts when gently setting it down. Now have a good look at which way the toilet is facing. You have some room for adjustment here. Turn it one way or the other to make it fit best for your bathroom.
  • Tighten the Closet Flange Nuts...... IMPORTANT. Do Not Over tighten. The Flange will break if you get to rough with it. Just tighten it till the toilet does not rock any more.
  • Replace the nut/bolt covers
  • Hook up the water lines again
  • Turn on water and flush the toilet several times and check for leaks.
Thats it, your done!  After a week or so check for leaks and make sure the toilet is not lose or rocking.

Cheers,

Anders


18 December 2016

Baja Mexico Trip 2015-2016, Part 12


Our First Month in Los Barriles, Baja California, Mexico


Liz walking on the beach in Los Barriles, Baja California Sur Mexico

Camped at East Cape RV Park in Los Barriles.
Los Barriles is a wonderful sleepy little town on the Sea of Cortez or Gulf of California.

The town has a population of around 1200 people give or take a few.

It is located about 100 km south of the capital La Paz and 65 km north of San Jose del Cabo.

Both La Paz and San Jose has good airports.

Los Barriles is known for its great fishing, and for wind and kite surfing.

Actually Los Barriles is know as Baja's Windsurfing Capital. The westerly wind averages around 35-45 km/hr.

Every year there is a big kite surfing, wind surfing and stand up paddle competition in town called "Lord of the Winds".


Local Fishermen in Los Barriles

La Fogata Restaurant
La Fogata Restaurante

Open mike at La Fogata. Susan and Catherine performing, just wonderful!

Anders out for a walk in Los Barriles.
Tons of people from all over the world descend into town during this competition.

We worked as volunteers for the 2016 competition. So much fun and excitement.

Many avid fishermen come to Los Barriles to fly fish for Marlin, Rooster fish, Tuna, Dorado and more.

The town offers plenty of amenities with stores, delis, cafes, hotels, campgrounds and endless beaches.

Every Wednesday night there is open mike at La Fogata Restaurant and the proceeds go to the local kids for continued education.

School is paid for up to grade six, after that the parents have to pay. This money that is collected at open mike goes to the local families to help pay for education. A very worthy cause.

We stayed at East Cape RV Resort right in town. This is a great and well run RV park with full hook-ups.

The park has a lot of permanent people that come back every year, and if you choose you can participate in many functions.

There is also a pickle ball court next door to the RV Park. Great fun!

Here every Saturday morning the Farmers Market is on up till about 1pm or so. Come early for best selections of vegetables and other stuff.

We are lucky to have some good long-time friends in Los Barriles.

Lorne and Catherine built a beautiful home here just on the outskirt of town. We have spent some wonderful evenings at their place.

Lorne and Catherine are the people that enticed us to come down and visit. Thanks you two.

During our three months stay in Los Barriles we were introduced to so many people and made a ton of new friends like Susan and Brian.

We also found the best massage therapist,  Christine and also a fantastic Physio Therapist Dennis. Dennis and his wife are also fantastic two step dancers. Thanks for the lessons Dennis.

We even took Spanish lessons. Just so much excitement and lots to do.

From Los Barriles it is easy to make day trips down to Los Cabos (San Jose del Cabo and Cabo San Lucas).

Shopping is really good down here along the Corridor with many local stores including a Costco and Walmart.

If you have not been in Los Barriles, Mexico, add it to your bucket list. It is a very safe and quaint little town.

More pictures from Los Barriles.

Cheers,

Anders and Liz


11 December 2016

Baja Mexico Trip 2015-2016. Part 11


Ciudad Constitución to Rancho Verde and onward to Los Barriles


It is the 13th of December 2015 and we have a leisurely morning with a nice breakfast. We break camp, pack up and get the truck and trailer ready for the next trip.

Once we are packed, we go over our usual trip inspection to make sure all is ready and all the lights work as they should.

This morning many of the streets in Ciudad Constitución are closed off by Police. We realise there is some kind of race happening.

Wonderful Landscape as we Motor Along to Rancho Verde.
It is beautiful sunshine as we motor out of town towards Rancho Verde and Los Barriles. The road is great and absolutely straight up till Santa Rita.

In Las Pocitas they have built a brand new Pem-X gas station and Oxo store. Two years ago this was only a two building town, with a lovely older man selling odds and ends. Now it even has a coffee shop.

Village of El Triunfo

Lots of curves and mountain passes.

Incredibly beautiful landscape as we get close to Rancho Verde
We drive around and through La Paz with not too much traffic.


You really have to watch for the stop signs in this town. Not easy to see in many places.


Once we get closer to El Triunfo and San Antonio the narrow road winds over mountains through lots of steep curves.


Liz is a bit uncomfortable, but all goes well and the truck gets a good workout.


We stop and spend the rest of the day and night at Rancho Verde RV Haven at km 142.5 or 32 km before Los Barriles.


This very well maintained RV Park is way up in the mountain, just off the highway.


There is lots of room to turn around inside the park. I believe this is still a working ranch.


There is water only available, so you have to be self sufficient otherwise.


This is of course no problem for us with the solar panels and even a generator as a back up.


We really like this RV Park, it is peaceful and beautiful.


Rancho Verde RV Haven
Anders and Liz at Rancho Verde RV Haven

Wonderful flowers all around the Rancho Verde RV Haven.

Liz on our hike with cactus and trees.
Liz on our hike

Anders on the hike around Rancho Verde RV Haven
We were the only guests here which is really surprising since it is so nice up here with all kinds of hiking trails.


We have a really good sleep and wake up to a cool morning; it's the 14th of December which is our anniversary. Happy Anniversary Darling!


I cook up some eggs and bacon as the sun comes up, soon it starts dripping from the roof gutters. We must have had a bit of frost over night.


After breakfast we go for a nice hike around the Ranch, just a wonderful area to hike in.


After the hike I head down to the ranch house to see if we could pay, nobody was able to collect money yesterday.


This time I had better luck, and I paid our dues.


We break camp. We only have a short drive today to Los Barriles.


Once in Los Barriles we check into East Cape RV Park. It is located on a street called "20th of Novembre".


This is wonderful park with all the amenities and with large RV sites.


More on this RV Park and Los Barriles in our next blog post.


Here are some more pictures from this part of our trip.


Cheers,

Anders and Liz


10 December 2016

Baja Mexico Trip 2015-2016. Part 10


Visiting San Juanico at Scorpion Bay, Las Barrancas, Puerto Adolfo Lopez Mateos


Going West Towards Las Barrancas

Work on bridge
Work on bridge

Cattle grassing along the river

Incredible Sand Dunes That Goes on For Ever.
Incredible Sand Dunes That Go on Forever.
It is the 11th of December, and boy o boy have we already been busy today, and we are not finished yet. See our previous blog post from San Miguel de Comondu and San Jose de Comondu.

We have just arrived at Mex 1 at Ej. Francisco Villa from San Miguel de Comondu.

Here we turn north on Mex 1 for about 25 km.

Then we turn west toward Las Barrancas on our way to Scorpion Bay and the town of San Juanico.

This road is now paved. It is not going all the way to La Purisima like in the olden days.

The drive west toward the Pacific Ocean is flat and the cacti looks grey, almost dead like. We do not know what has caused this?

Otherwise the scenery is absolutely fantastic with the huge rolling sand dunes past the inlet of Boca San Gregorio.

Here the bridge is out over the inlet La Purisima, and we drive over a temporary contraption.

To re-enforce the bridge, by hand, the workers stack rocks in wire cages.

They then align the cages  along the bridge for support.

In San Juanico we are staying at the Las Casitas with John and Christine.

It is like a small motel with a common outdoor kitchen that all the guests can use.

This is a very nice and clean casita motel and the owners are very friendly.

Parking is inside the walls of the property.

San Juanico is a quaint little town that is completely off the grid and is geared towards windsurfing.

There are also lots of large fishing boats anchored in the bay.

We have a walk around town and take in the sights. Lots of houses are for sale here. The town is fairly empty and not much is going on. Apparently the surfing season here is from May through October.

Las Casitas in San Juanico on Scorpion Bay

Liz Overlooking Scorpion Bay

Fishing boats anchored in Scorpion Bay

Dinner at El Burros in San Juanico
That night we have dinner at El Burros and do some people watching.

We see all kinds of characters here.
In the evening some loud music kept us awake for a while, but we really had a big day, so it did not take us long to fall a sleep.


San Juanico on Scorpion Bay Back to Ciudad Constitución

We awake early the next morning. We sure had a good sleep.

We get dressed and go for a walk about to find a place for breakfast.

We end up at El Burros again, because we could not find anything else open this morning.

We had a nice breakfast. I had shrimp omelet with beans and Liz had scrambled eggs and bacon with rice and beans. Really good!

After driving around town and along the sandy cliffs we decide to leave San Juanico and work our way back to Ciudad Constitución.

We drive into Las Barracas. This is an old fishing town. Except for some workers at a local slaughter house there is not much happening here.

A bit sad and depressing.

We also decide to drive out to Puerto Adolfo Lopez Mateos (La Soledad).

The road out is good and straight. This is a sleepy little town now, but the high season is around the corner when the whale watching start.

We are told the the big Gray Whale mamas push the calves up to the boats so they can be petted.

In this town, most businesses are closed and are patiently waiting for the Gray whales.

Even the 100's of pelicans look bored.

Although most people we see seems happy, even though they don't have very much.

Back at Misiones RV Park in Ciudad Constitución we make supper and have an early night. But wait... it is Saturday night. The party starts in town with loud music, fire crackers or gun shots and it goes on till early morning when the darn roosters take over with their serenade.

Patti comes and wishes us a good trip as we head out.

Here are some more pictures from this part of the trip.

Cheers,

Anders and Liz