google.com, pub-1183232341631896, DIRECT, f08c47fec0942fa0 We Discover Canada And Beyond: August 2015
My RV Cook Book, "Tinfoil Cooking" is now published on Amazon!

Check it out Amazon.ca, Amazon.com, Amazon.de, Amazon.co.uk or any other site worldwide! For a luxury coilbound version on 80# stock go to my cooking website AndersCooks.ca


30 August 2015

Adding a Pressure Tank to Your RV


Installing a Pressure Tank in my RV
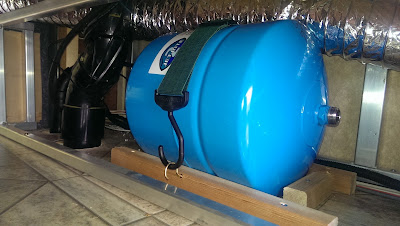


Pressure tank in place with cradle and tie down.
I decided to install a small pressure tank in our 5th wheel trailer. The benefit of having a pressure tank is that the pump does not always kick in and out as often, resulting in less noise.

Also for us we do a lot of dry camping and we can have access to lots of water with out running the pump in the evenings and when using the washroom at night. Saves battery power when the solar panels are not working.

Pressure gauge and valve in place.
First I decided on a place to put the tank where it is easy enough tie in to the current water line. The tie in should be on the pressure side of the pump.

For us it worked best in an area that was blocked off and not used at all in the pass-through compartment or what I call the "underbelly". This area is within 2-3 ft of the water pump.


Since there was no pressure gauge anywhere in the RV showing the water pressure, I decided that this would be a good time to add one. A valve also seemed to be in order so I could by pass the pressure tank if need to be.


After measuring and figuring out what pluming parts were needed I headed off to the local plumbing shop. I even brought along the hose on the pressure side of the pump that goes from the pump to the filter (this is where I decided to tie in the pressure tank).


I purchased a 4.8 gallon tank, pressure gauge, a valve, all the fittings and a 3 ft chunk of hose.


These kind of pressure tanks can be installed laying down and that worked best for me. I made a little cradle so the tank can not move around and added a couple of hooks for the tie-down.

Added a "T" to tie in to the current water line
Added all the fittings with lots of Teflon tape. When it came to tying in to the existing water line and adding the extra piece of hose, I put the hoses in some hot water for a few minutes, they are then much easier to work with.


Everything hooked up and tightened up it was time to turn the water on. Must have done something right, no leaks.


Panel installed back in to place. All that is showing is the pressure gauge.
The pump cycled and the pressure came up to 40 psi. This was perfect for me since the pressure tank comes pre-charged to 38 psi.

When installing a pressure tank like this the charge in the tank should be 2 psi below where the pump cuts in (according to manufacture recommendation). In my case 40 psi.

If you have to change the pre-charge in the tank, make sure to have no water pressure on the other side. The air valve stem is on the top or opposite side of the water intake. Use your compressor to add more air or press the valve to release air. Just like on a tire.

The cost for material for this project is under $200.00

It all seems to works well. Will keep you posted if I have to change anything.

Good luck with your project.


08 August 2015

RV Bathroom Solar Night Light


Solar Night Light for the Bathroom in our RV


Solar Light to be installed in RV as a Solar Night Light.
When camping, it is nice to have a night light on in the bathroom without having an extra draw on the batteries in your RV. Even if you have a full hock-up it is nice to have a night light in the bathroom.


This is especially true when "Dry Camping" without any services. Every extra Amp hour in the battery becomes so valuable.


To accomplish this, I have to have sunlight to charge the solar battery.


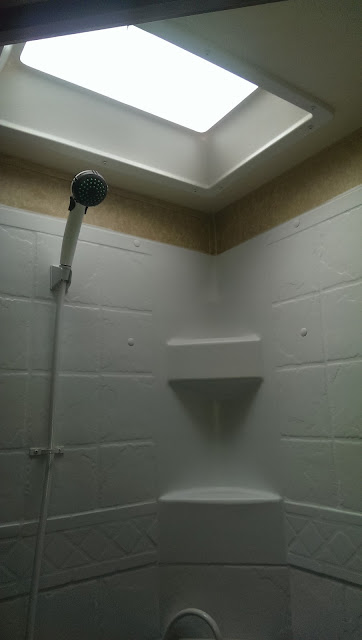
The bathroom skylight looked like a good candidate.


The skylight has a "bubble", the top/outside glass and also an inside glass (it's all plastic).


The sky lite in the bathroom in our RV
The skylight in the bathroom in our RV
There is about 3 inches between the outside and inside glass. This is where I decided to install a solar light.


So what I did, I went to Walmart and picked up a few garden solar lights at $1.00 each.


The kind I'm talking about, are the ones that sits on a stick and are meant to be put along the walkways in your garden.


I then removed the actual stick from the light. But, I did not want the light to shine outward, but rather downward.


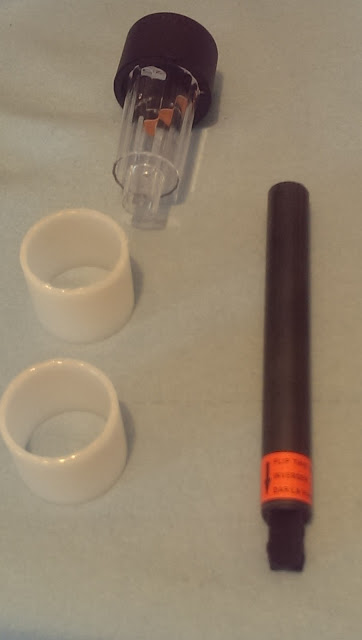
So I looked around my shop to see what I could find. I had two hard white plastic rolls (from a rolls of reflective tape).


I glued them together and then inserted the solar light.


Solar light with stick removed and the two plastic pipes for the RV  Night Light.
Solar light with stick removed and the two plastic pipes for the RV
Night Light.

The two plastic pipes glued together to fit the RV solar night light
The two plastic pipes glued together to fit the solar light

Inserting the solar light in the plastic pipe for the RV solar night light.
Inserting the solar light in the plastic pipe.

Light sitting in the plastic pipe.
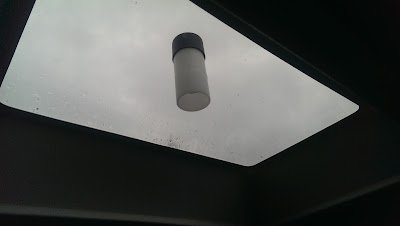
RV Solar Night Light in Place
I then inserted the solar light inside or just on top of the lower glass and screwed the glass back in.


This worked very well, the light just nicely fits inside and is the correct size to fit in-between the top and bottom glass in the sky lite.


This makes life just a bit easier when camping.