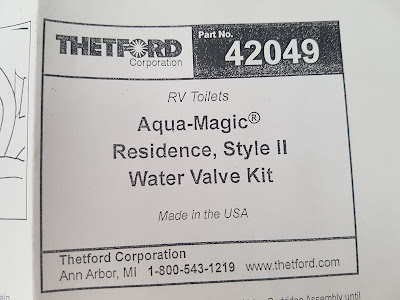
Changing The Water Valve in Aqua Magic Style 2 Toilet. Part # 42049
 |
| Aqua Magic Style II Water Valve Kit |
 |
| Instructions for Aqua Magic Style 2 Water Valve Kit |
Sometimes things on the RV or in our case the 5th Wheel Trailer breaks down.
In our case the water valve in the RV toilet would not shut off. The water just keeps running.
This happen to us after sitting for several months and not being used.
It was actually just before Christmas and we had several of our kids and grand kids coming up and we needed the extra space in the trailer.
I filled the trailer up with water and then turned the pump on and the water in to the toilet just kept running.
Living on a small little Island in the Pacific Ocean there was not a hope of getting a new valve for the toilet.
So what I did in the meantime was to install a brass shut off valve on the waterline.
This way the toilet could still be used. A bit of a pain having to shut the water off manually, but way better then not having a toilet at all.
We had a trip planned to California and Arizona starting New Years Day. I could always pick up a water valve there or on the road down some place.
Actually as I am writing this blog post we are camped at Palm Springs Oasis RV Park in Cathedral City, California. This is a very nice park by the way.
I got the water valve for the Aqua Magic Style II, part number 42049 from a local dealer here in the Palm Springs area called
Benlo Co. RV Service and supplies. Very good and efficient.
This is what you need for the repair:
 |
| Stuff needed for the repair job. |
- The Aqua Magic Style II replacement kit. Part number 42049. Comes with instructions.
- Three large Garbage Bags
- A set of latex gloves
- Head lamp or flash light
- Plumber Pliers
- Needle Nose pliers
- ½ inch Wrench
- Philips Screwdriver
- Flat Screwdriver
- Vaseline
- Phone and or Digital Camera
- Roll of Paper towel or Rags
- Towel
- Spray Nine or other disinfectant cleaner
Have a good look at your repair kit/water valve kit. Make sure all the pieces are there. When you dismantle the toilet take pictures as you go. They will come in handy if you forget some steps. If you have lots of room beside your toilet (on the Pedal side) you do not need to remove the toilet. However most bathrooms in RV's are pretty tight.
Removing the Aqua Magic Style II Toilet:
- Before you start, spread a large plastic garbage bag on the floor.
- Clean out toilet well, empty the black tank and flush well. Add deodorizer and whatever liquid you use for the black tank. Use Spray Nine and clean the toilet well.
- Turn off water pump or disconnect water supply. Drain all water inside using the Pedal.
- If you have a pressure tank installed like I do, make sure to drain/release all the pressure in the lines or close by pass valve.
- Disconnect the water supply to the toilet. You may need a set of pliers or plumber pliers for this. Put some towels around the supply line to catch any water coming out.
- Using the flat screwdriver pop off the plastic caps covering the Flange Nuts.
- Grab the ½ inch wrench and remove the Flange Nuts. Note that these nuts are not super tight. Important when you install it back again.
- Lift the toilet straight up and lay it down on the garbage bag on its side, pedal side up.
- Use second garbage bag to cover the hole in the floor.
 |
Toilet removed. Note brass water valve I
installed on the water line at the back of the toilet. |
Now is a good time to take some more pictures even from the bottom side so you can see how the Closet Flange Seal fits on to the bottom of the toilet.... I know it may not look pretty.
Removing the Aqua Magic Style ll Water Valve.
 |
Grab handle and make a quick jerk for
the handle to come off. |
- With the toilet laying on its side, use your left hand holding the toilet bowl, grab the pedal with your right hand and give it a quick jerk up and off. I know what you are thinking, you are going to break the darn thing, but not so. Just give it a good pull and it will snap off. Put it to the side.
- Take some more pictures of what you see.
- The next step seems impossible but it works.... using your right hand, put your thumb in to the depression of the valve, fingers under the retainer, lift slightly and turn clockwise and it will come off just like that.
- Put to the side. I use the sink (close drain) or shower to put all the stuff in. Another picture maybe
- Grab your needle nose pliers and remove the Water Inlet Seal and compression spring (this is the sucker that caused the problem to start with). Put to the side.
Installing The New Aqua Magic Style II Water Valve
 |
Close up of the Water Valve Cartridge Assembly. Note you will not have
the brass valve on the far left. I installed that to be able to turn the water off |
- Using the Philips screw driver, insert the new Water Inlet Seal Assembly. The Spring only goes or fits one way in to the seal assembly.
- Put a tiny bit of Vaseline on the O-Ring on the Valve Cartridge.
- Insert new Water Valve Cartridge Assembly until fully seated. Note, if the Water Valve Cartridge Assembly is apart the Valve pice fits in to the Cartridge from underneath not from the top. Also make sure the O-Ring has not fallen off. It makes a big mess when you turn the water back on again. Yes I did experience this.
- Rotate retainer until it clicks in to place.
- When installing the pedal back in to place, you will need a bit of patience... a bit of swearing helps as well.
- Place Water Valve Arm in closed position.
- You have to make sure the arm lines up in three places. First the Water valve arm and the spring pedal pivot, then you push down (like you would step on the pedal) a bit and the drive arm pin fits in.
- Once in place keep pressure on it and then give it a good whack. It will snap in to place.
- Set toilet up on plastic bag and operate the pedal several times making sure the waste ball opens and closes properly. If the pedal falls off you screwed up, do it over again. I'm talking from experience here.
Once you have it all back in to place it is time for dirty work and time for the latex gloves, just slip them on..... and pretend you are a doctor doing a prostate check.
Remove the old Closet Flange seal and discard in third garbage bag. Using rags or paper towel clean out the flange. This is the time when you also clean out the floor area where the toilet sits on and the Closet Flange Seal meets the floor area.
Installing Aqua Magic Style II toilet
 |
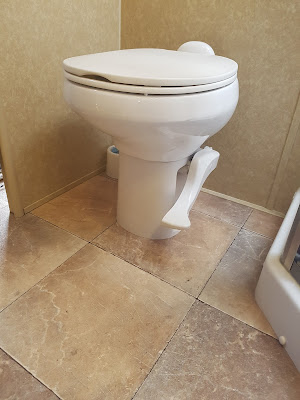
| Aqua Magic Style 2 water valve installed, toilet in place. |
- Install the Closet Flange Seal on the toilet itself. Lip side down.
- Remove plastic bag from opening in the floor.
- Remove and discard latex gloves.
- Lift up toilet and align the flange bolts when gently setting it down. Now have a good look at which way the toilet is facing. You have some room for adjustment here. Turn it one way or the other to make it fit best for your bathroom.
- Tighten the Closet Flange Nuts...... IMPORTANT. Do Not Over tighten. The Flange will break if you get to rough with it. Just tighten it till the toilet does not rock any more.
- Replace the nut/bolt covers
- Hook up the water lines again
- Turn on water and flush the toilet several times and check for leaks.
Thats it, your done! After a week or so check for leaks and make sure the toilet is not lose or rocking.
Cheers,
Anders


